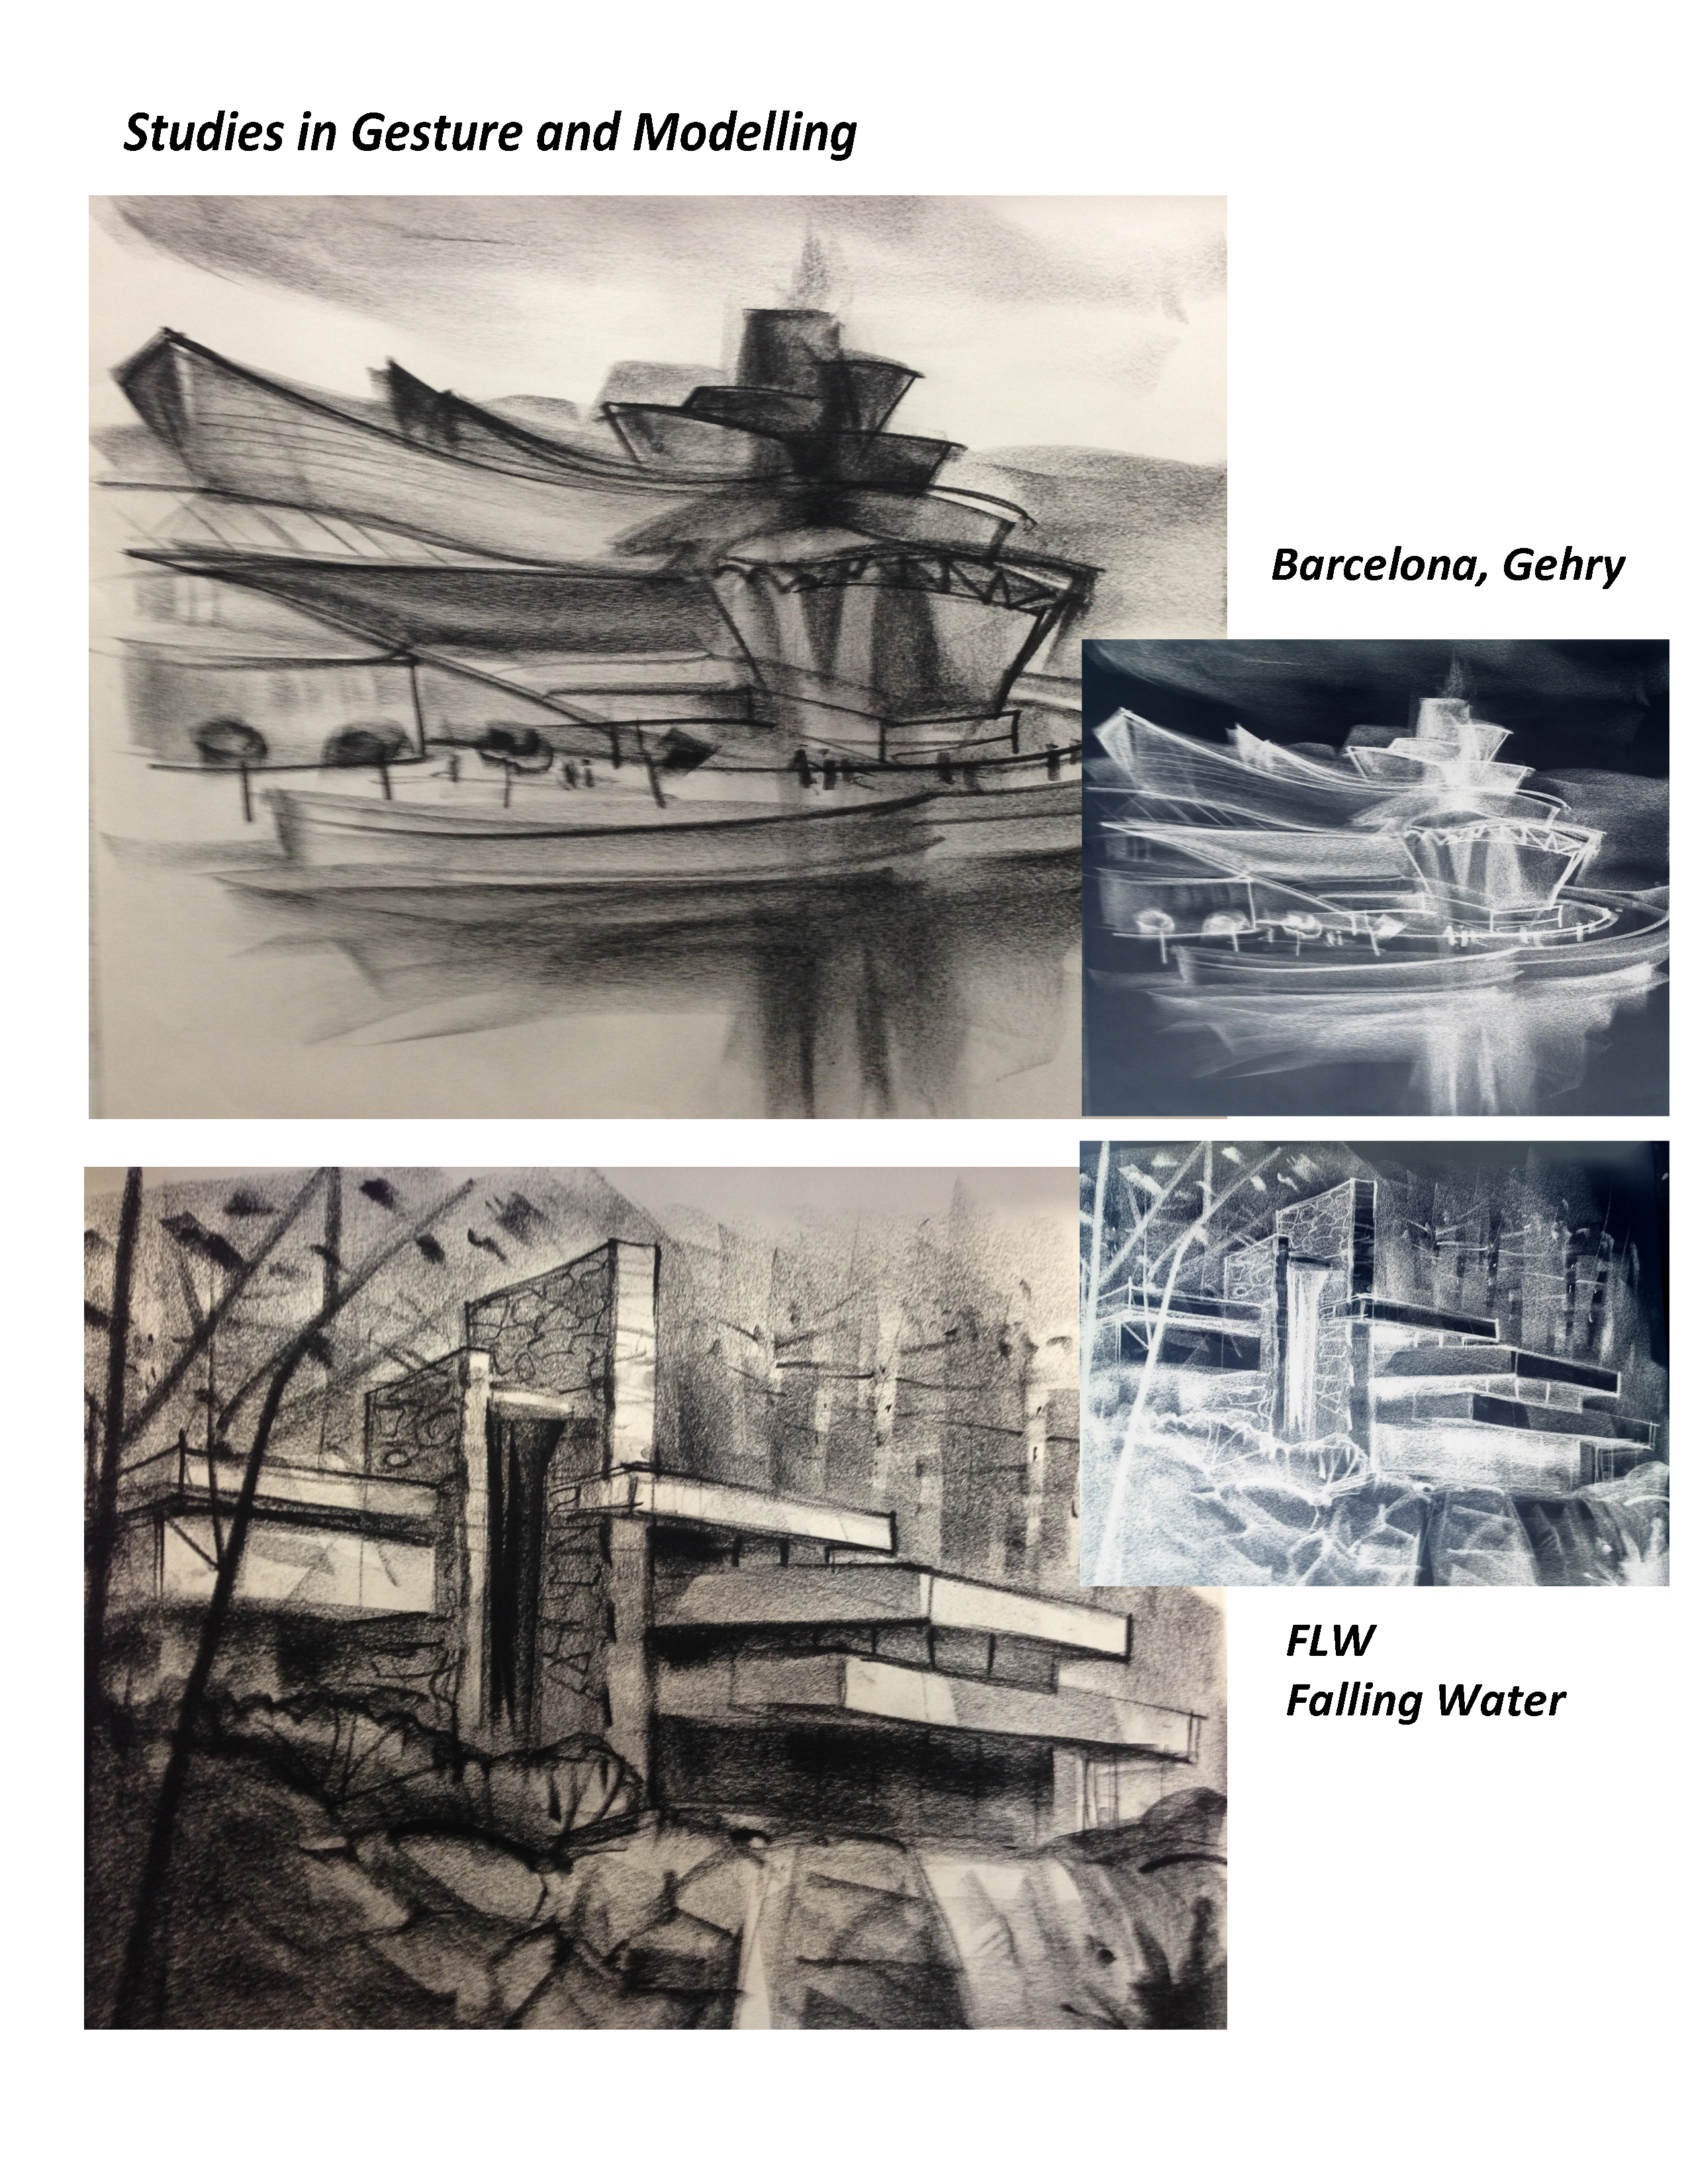
Quick studies, such as gesture and modelling (shading), can be effective in portfolios. They show an ability to be loose and free in your explorations and approach. Freedom in sketching can help personalize a portfolio which can tend to look a bit ‘cold and rigid’. As above, try using a variety of Photoshop conversions and combining several images on a page in a layout – with some type that describes what and why these studies are done. For layout ideas, just google: “architecture student portfolio template”. For more on this see my post called: “Ten Ways of Seeing and Drawing (Mar 15, 2015)“ , under the category “Perceptual and creative drawing.” I will make more vids on this subject in near future.
Notes for: Ten Ways of Seeing and Drawing Tony O’Regan
We think of drawing as being comprised of 10 different perceptual filters, abilities or ways of seeing. Like the filters a photographer might use with a camera, we can use them individually or in combinations on a single drawing to achieve a near-infinite variety of effects. When you have mastered them, even at a basic level, you will have a powerful “tool kit” for use in drawing and design.
Gesture: Like the miming gestures one might make with the hands and arms when describing, for example, a vase of flowers or a building.
Contour: Draw the lines in a subject with enhanced tactile content by strong belief that you are ‘touching’ with finger tips or flats. This belief is transmitted into the marks and on to the viewer. Edges (finger tips) become lines; surfaces (finger flats) become textures.
Mass: The 3d volumetric ‘heft’ of a subject – like a wireframe but with more feeling.
Space: Think of a subject immersed in water. Draw the water, encountering the subject and pausing the medium where it stops against the subject. The sum total of stoppages implies the form. But do not draw the actual form…concentrate on the space. The water metaphor helps.
Shape: The positive Shape is like the shadow of a subject projected on a wall. The negative silhouette is the reverse. Concentrate on ‘shape-making…don’t draw and colour in.
Figure Ground: A shape or object has 3 ways to contrast with the background: darker than, lighter than or transitional (part darker and part lighter). The ‘transitional’ is also called a “figure-ground reversal”. You take control and choose.
Tonality: Translate a continuous toned image into 3 or 4 tonal values: The lights give Sparkle. The darks give impact. The mid-tones give subtlety and richness. This creates a ‘tonal design’ versus a mere ‘documentation’.
Shading: Select a light source and logically create shade sides and cast shadows. This is what we normally try to do when shading naturalistically.
Geometrics : Perspective and other systems, such as paralines) Apply the methods of geometry to creating the 3d visual illusion. The three main visual cues for depth are: overlapping, diminution, convergence. These are supported by ‘position on a background plane’, atmospherics, lineweights, colour temperature, degree of detail and sharpness of focus, etc.
Composition: Apply an ordering concept, a design, to the elements in the picture. There are many traditional systems, or you may create one of your own through observation or informed intuition. This is the ‘design concept’ we apply to the organization of the image. Also consider scale, format, cropping, focal points, eye path, dominance, balance, numbers and hierarchy of shapes, and other general design principles.