Day 8/8 FOUR PLAN PROJECTION VIDEOS

Login to view this content or Join us and Register.

Please note: Some video tutorials are exclusive to students currently enrolled in courses at Emily Carr. If you are already logged in but you cannot access this content, if may be because you do not have the required membership level. Please contact Tony if you are interested in a course.

GESTURE AND MODELLING STUDIES (click photo title) – Portfolio Ideas

GEHRY AND FLW

Quick studies, such as gesture and modelling (shading), can be effective in portfolios. They show an ability to be loose and free in your explorations and approach. Freedom in sketching can help personalize a portfolio which can tend to look a bit ‘cold and rigid’. As above, try using a variety of Photoshop conversions and combining several images on a page in a layout – with some type that describes what and why these studies are done.  For layout ideas, just google: “architecture student portfolio template”.  For more on this see my post called: Ten Ways of Seeing and Drawing (Mar 15, 2015) , under the category “Perceptual and creative drawing.” I will make more vids on this subject in near future.

Notes for:  Ten Ways of Seeing and Drawing       Tony O’Regan

 We think of drawing as being comprised of 10 different perceptual filters, abilities or ways of seeing. Like the filters a photographer might use with a camera, we can use them individually or in combinations on a single drawing to achieve a near-infinite variety of effects. When you have mastered them, even at a basic level, you will have a powerful “tool kit” for use in drawing and design.

 Gesture:   Like the miming gestures one might make with the hands and arms when describing, for example, a vase of flowers or a building.

 Contour:   Draw the lines in a subject with enhanced tactile content by strong belief that you are ‘touching’ with finger tips or flats. This belief is transmitted into the marks and on to the viewer.  Edges (finger tips) become lines; surfaces (finger flats) become textures.

 Mass:   The 3d volumetric ‘heft’ of a subject – like a wireframe but with more feeling.

 Space:   Think of a subject immersed in water. Draw the water, encountering the subject and pausing the medium where it stops against the subject. The sum total of stoppages implies the form. But do not draw the actual form…concentrate on the space. The water metaphor helps.

 Shape:   The positive Shape is like the shadow of a subject projected on a wall. The negative silhouette is the reverse. Concentrate on ‘shape-making…don’t draw and colour in.

 Figure Ground:   A shape or object has 3 ways to contrast with the background: darker than, lighter than or transitional (part darker and part lighter). The ‘transitional’ is also called a “figure-ground reversal”. You take control and choose.

 Tonality:   Translate a continuous toned image into 3 or 4 tonal values: The lights give Sparkle. The darks give impact. The mid-tones give subtlety and richness. This creates a ‘tonal design’ versus a mere ‘documentation’.

 Shading:   Select a light source and logically create shade sides and cast shadows. This is what we normally try to do when shading naturalistically.

 Geometrics :  Perspective and other systems, such as paralines) Apply the methods of geometry to creating the 3d visual illusion. The three main visual cues for depth are: overlapping, diminution, convergence. These are supported by ‘position on a background plane’, atmospherics, lineweights, colour temperature, degree of detail and sharpness of focus, etc.

Composition:   Apply an ordering concept, a design,  to the elements in the picture. There are many traditional systems, or you may create one of your own through observation or informed intuition. This is the ‘design concept’ we apply to the organization of the image. Also consider scale, format, cropping, focal points, eye path, dominance, balance, numbers and hierarchy of shapes, and other general design principles.


Ten Ways of Seeing and Drawing STILL PIX- EXAMPLES (Mar 15 2015) Click title for pics

 This is pretty much the backbone of my own artistic learning, practicing, and teaching methods, as regards drawing. Of course, it also works into painting, design, etc:

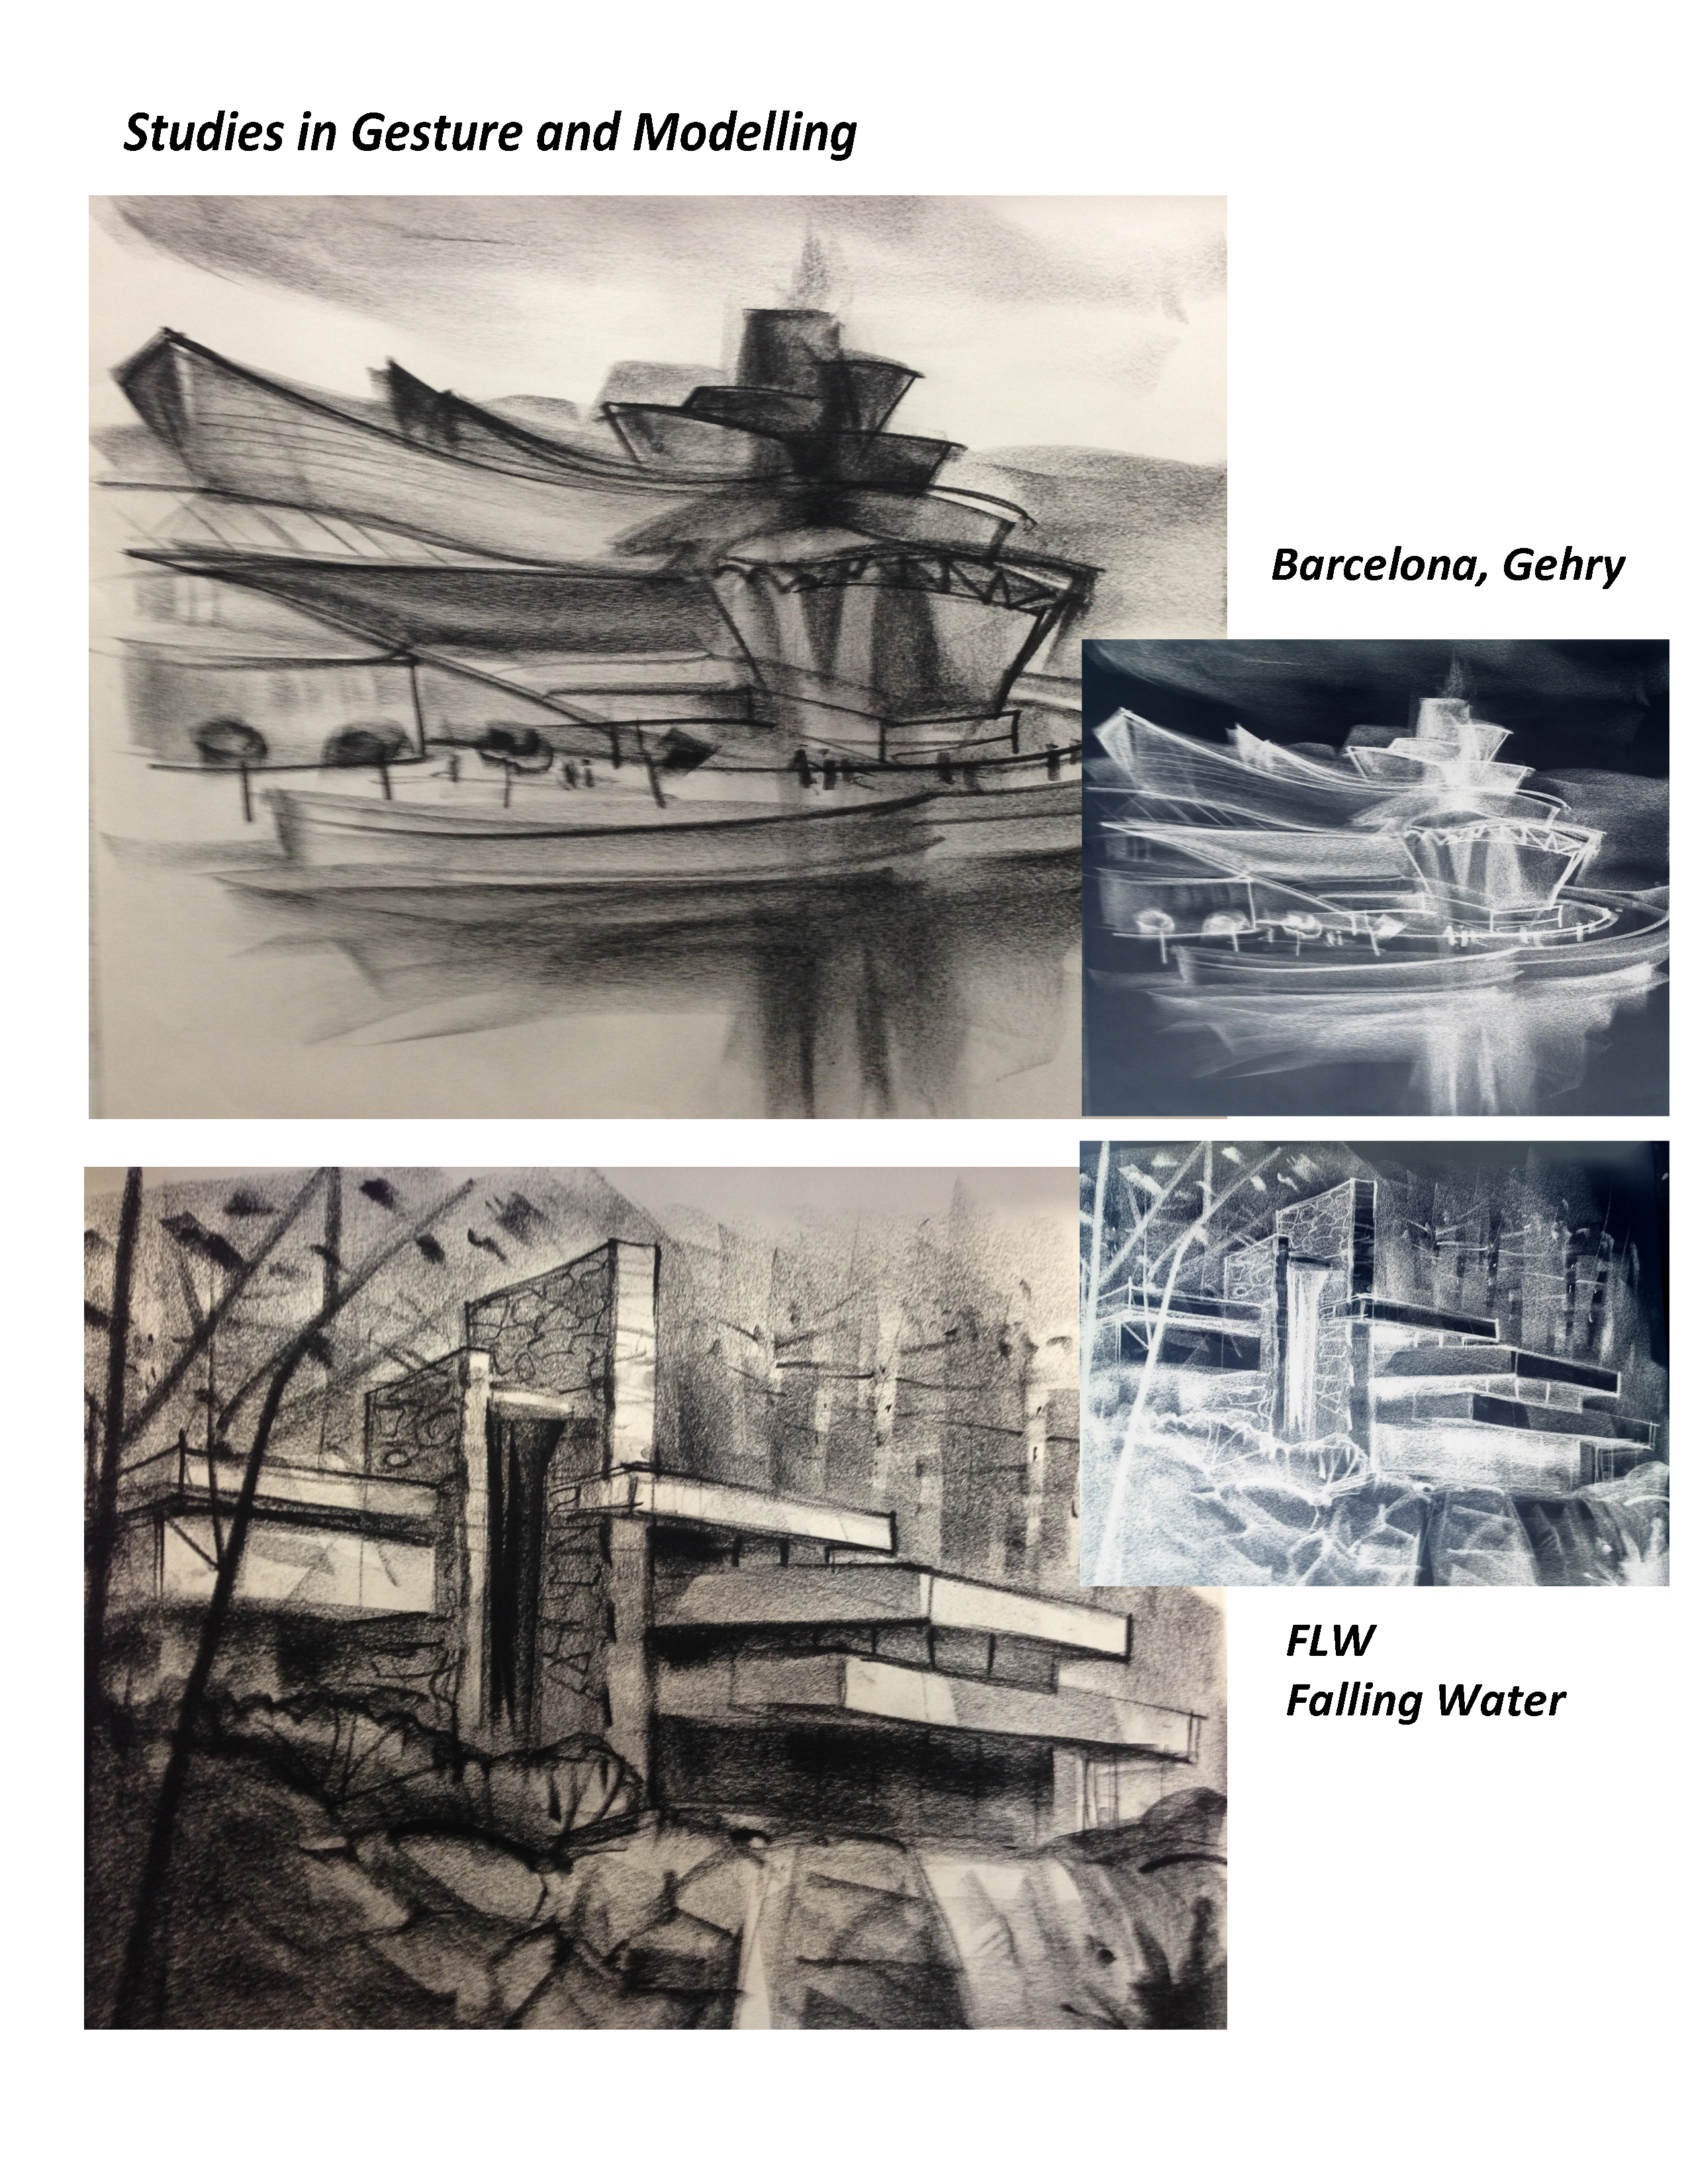
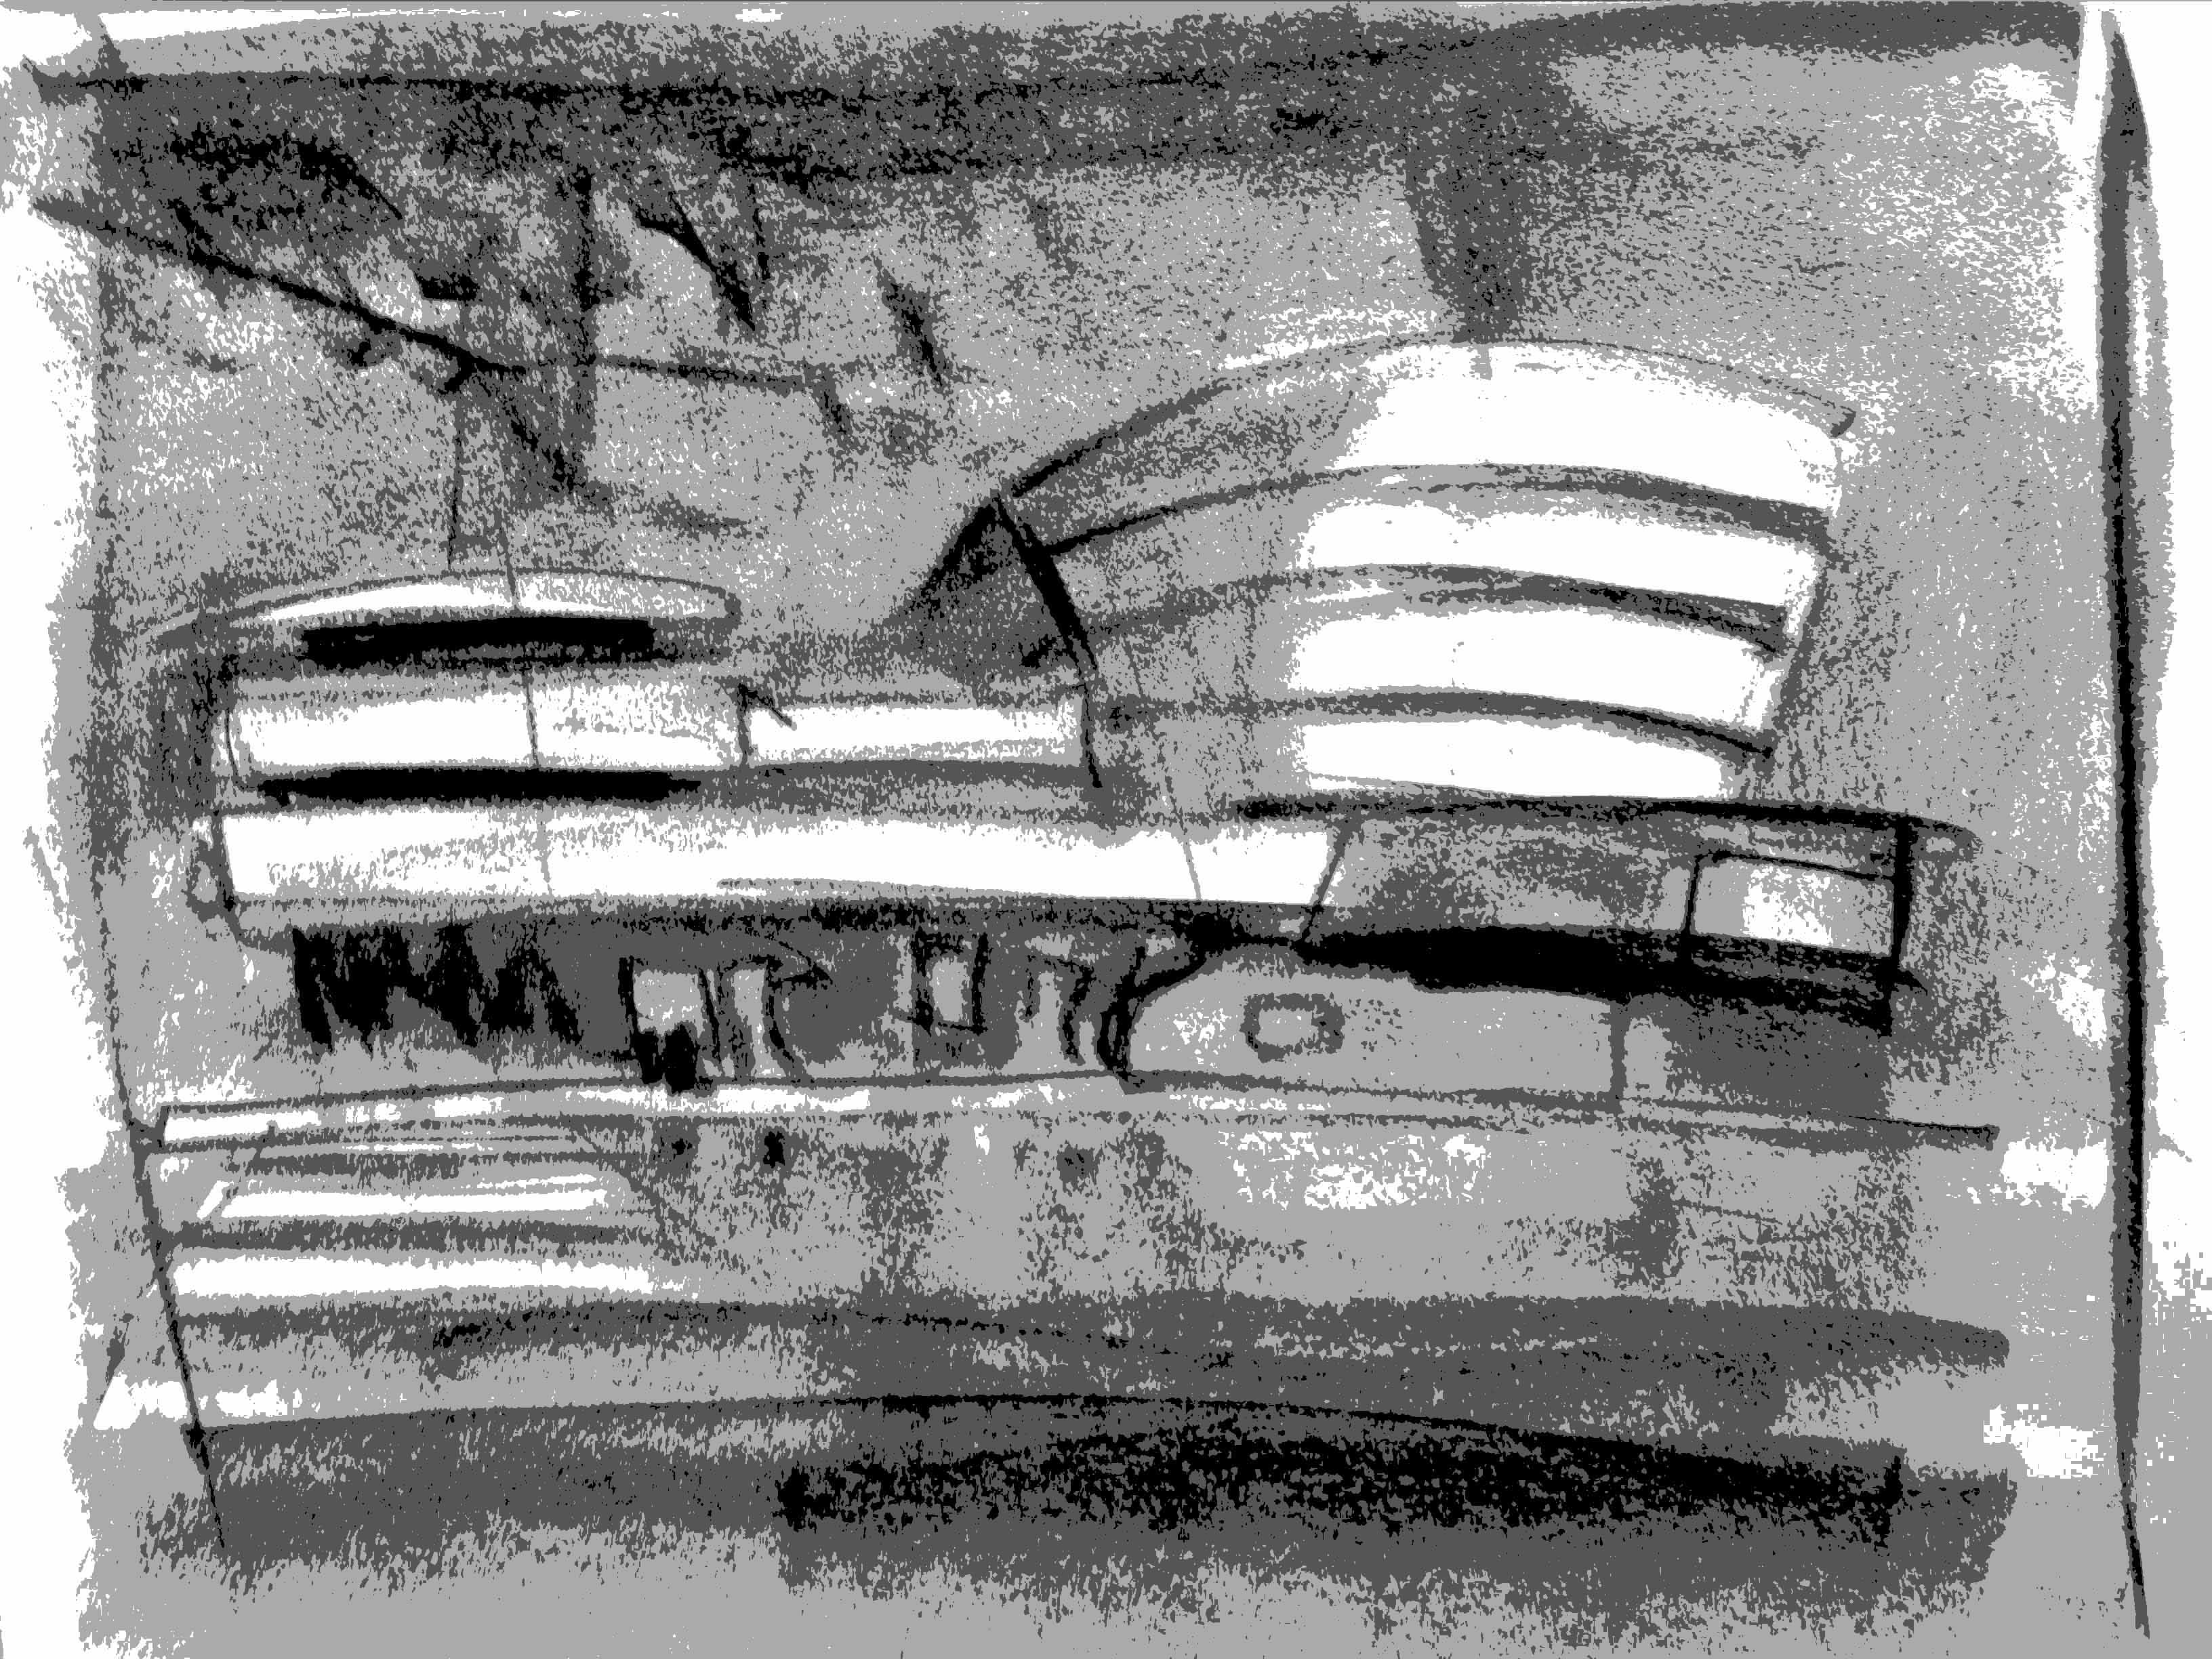
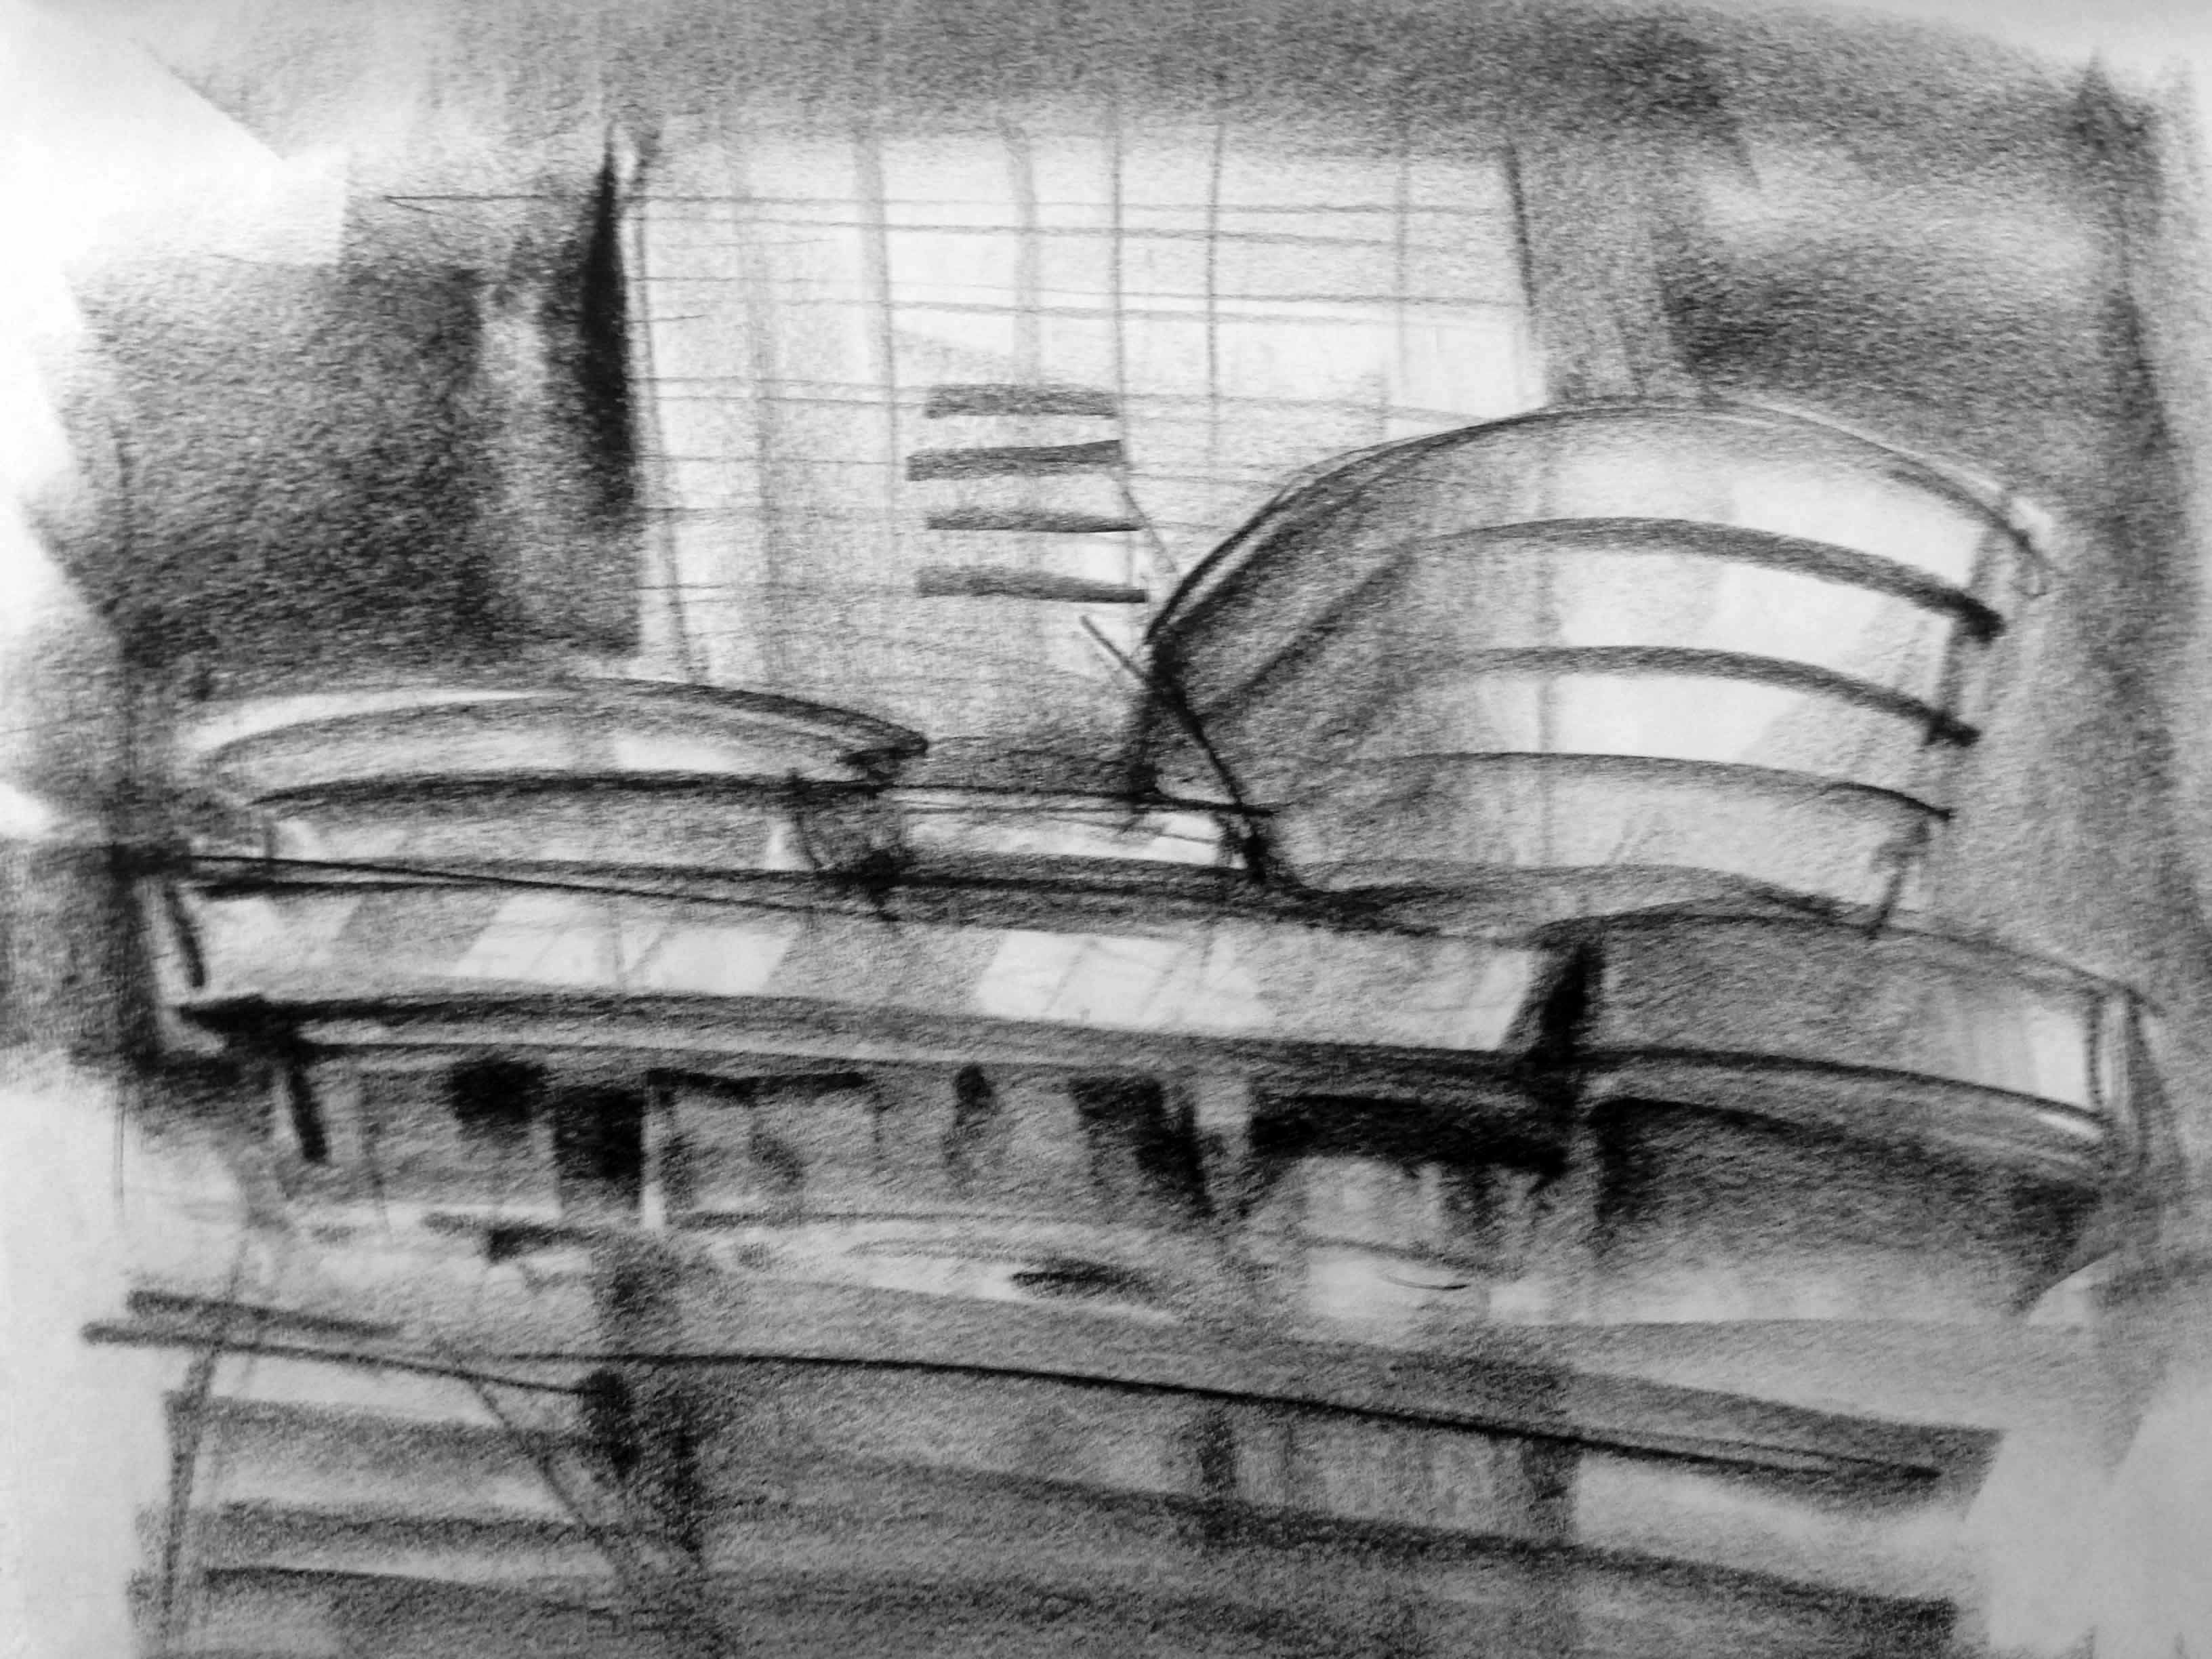
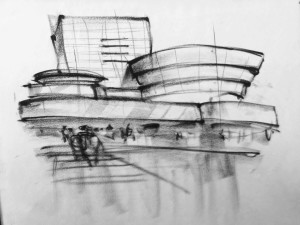
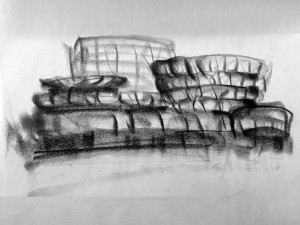
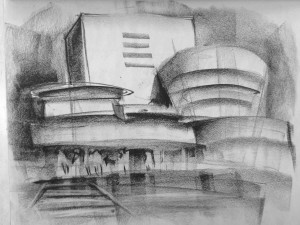
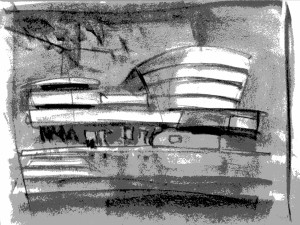
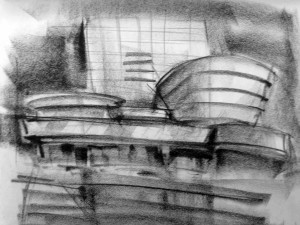
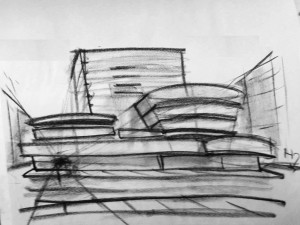
Think of drawing as being comprised of 10 distinct perceptual filters, abilities, or ways of seeing. (Long ago I read a very famous book called “Zen of Seeing, Drawing” by F.Franck – Definitely worth reading – lots of great and valid insights! Franck’s book started me thinking in this direction). Like the filters a photographer might use with a camera, we can use these ways of seeing individually or in combinations on a single drawing to achieve a near-infinite variety of effects. When you have mastered them, even at a basic level, you will have a powerful “tool kit” for use in drawing, painting, and design of all kinds. The following are basically a set of preliminary studies, aimed at creating a very thorough awareness in the artist. The trick is to keep the energy going from prelims through the final drawing. With experience you can do a lot of it in your head, flipping from ‘filter’ to ‘filter’, mentally. Perspective used alone can deaden the overall image. Here, the 10 Ways are illustrated primarily using Frank Lloyd Wrights MOMA Guggenheim. 

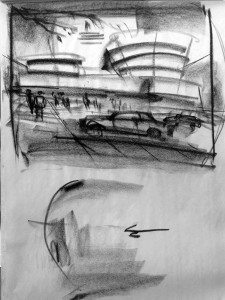
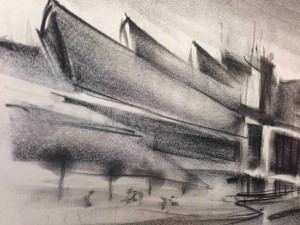
1- GESTURE:   Imagine the way a ‘mime’ might make gestures in the air to describe your subject. You pretty much do the same thing but leave a record on paper with charcoal  when describing, for example, a vase of flowers or a building. This involves larger arm muscle movement – air guitar with charcoal. Gestures are considered the ‘lines of life’. If there is a strong gesture there is greater chance of having life and power in your drawing. Everyone can do it, but practice makes it into a skill. All the drawings that follow begin with a light gesture underneath. Below are gestures of FLW’s Guggenheim in NY and of Gehry’s Guggenheim in  Barcelona – 

GESTURE CDA10 WAYS MAR 2015 (39)_edited-1GUGGENHEIM BARCELONA GEHRY MAR 2015 CDA (25)


2-CONTOUR:   Draw the edge-lines in a subject with enhanced tactile content by developing the strong belief that you are ‘touching’ the object with finger tips or flats. This belief is transmitted into the marks and out to the viewer.  Edges (finger tips) become lines; surfaces (finger flats) become textures. Develop ‘line-quality’, for example, by digging in at the beginning and end of each line. Corners, intersections , places where lines stop and change directions are made important –  

CONTOUR CDA 10 WAYS MAR 2015 (32)


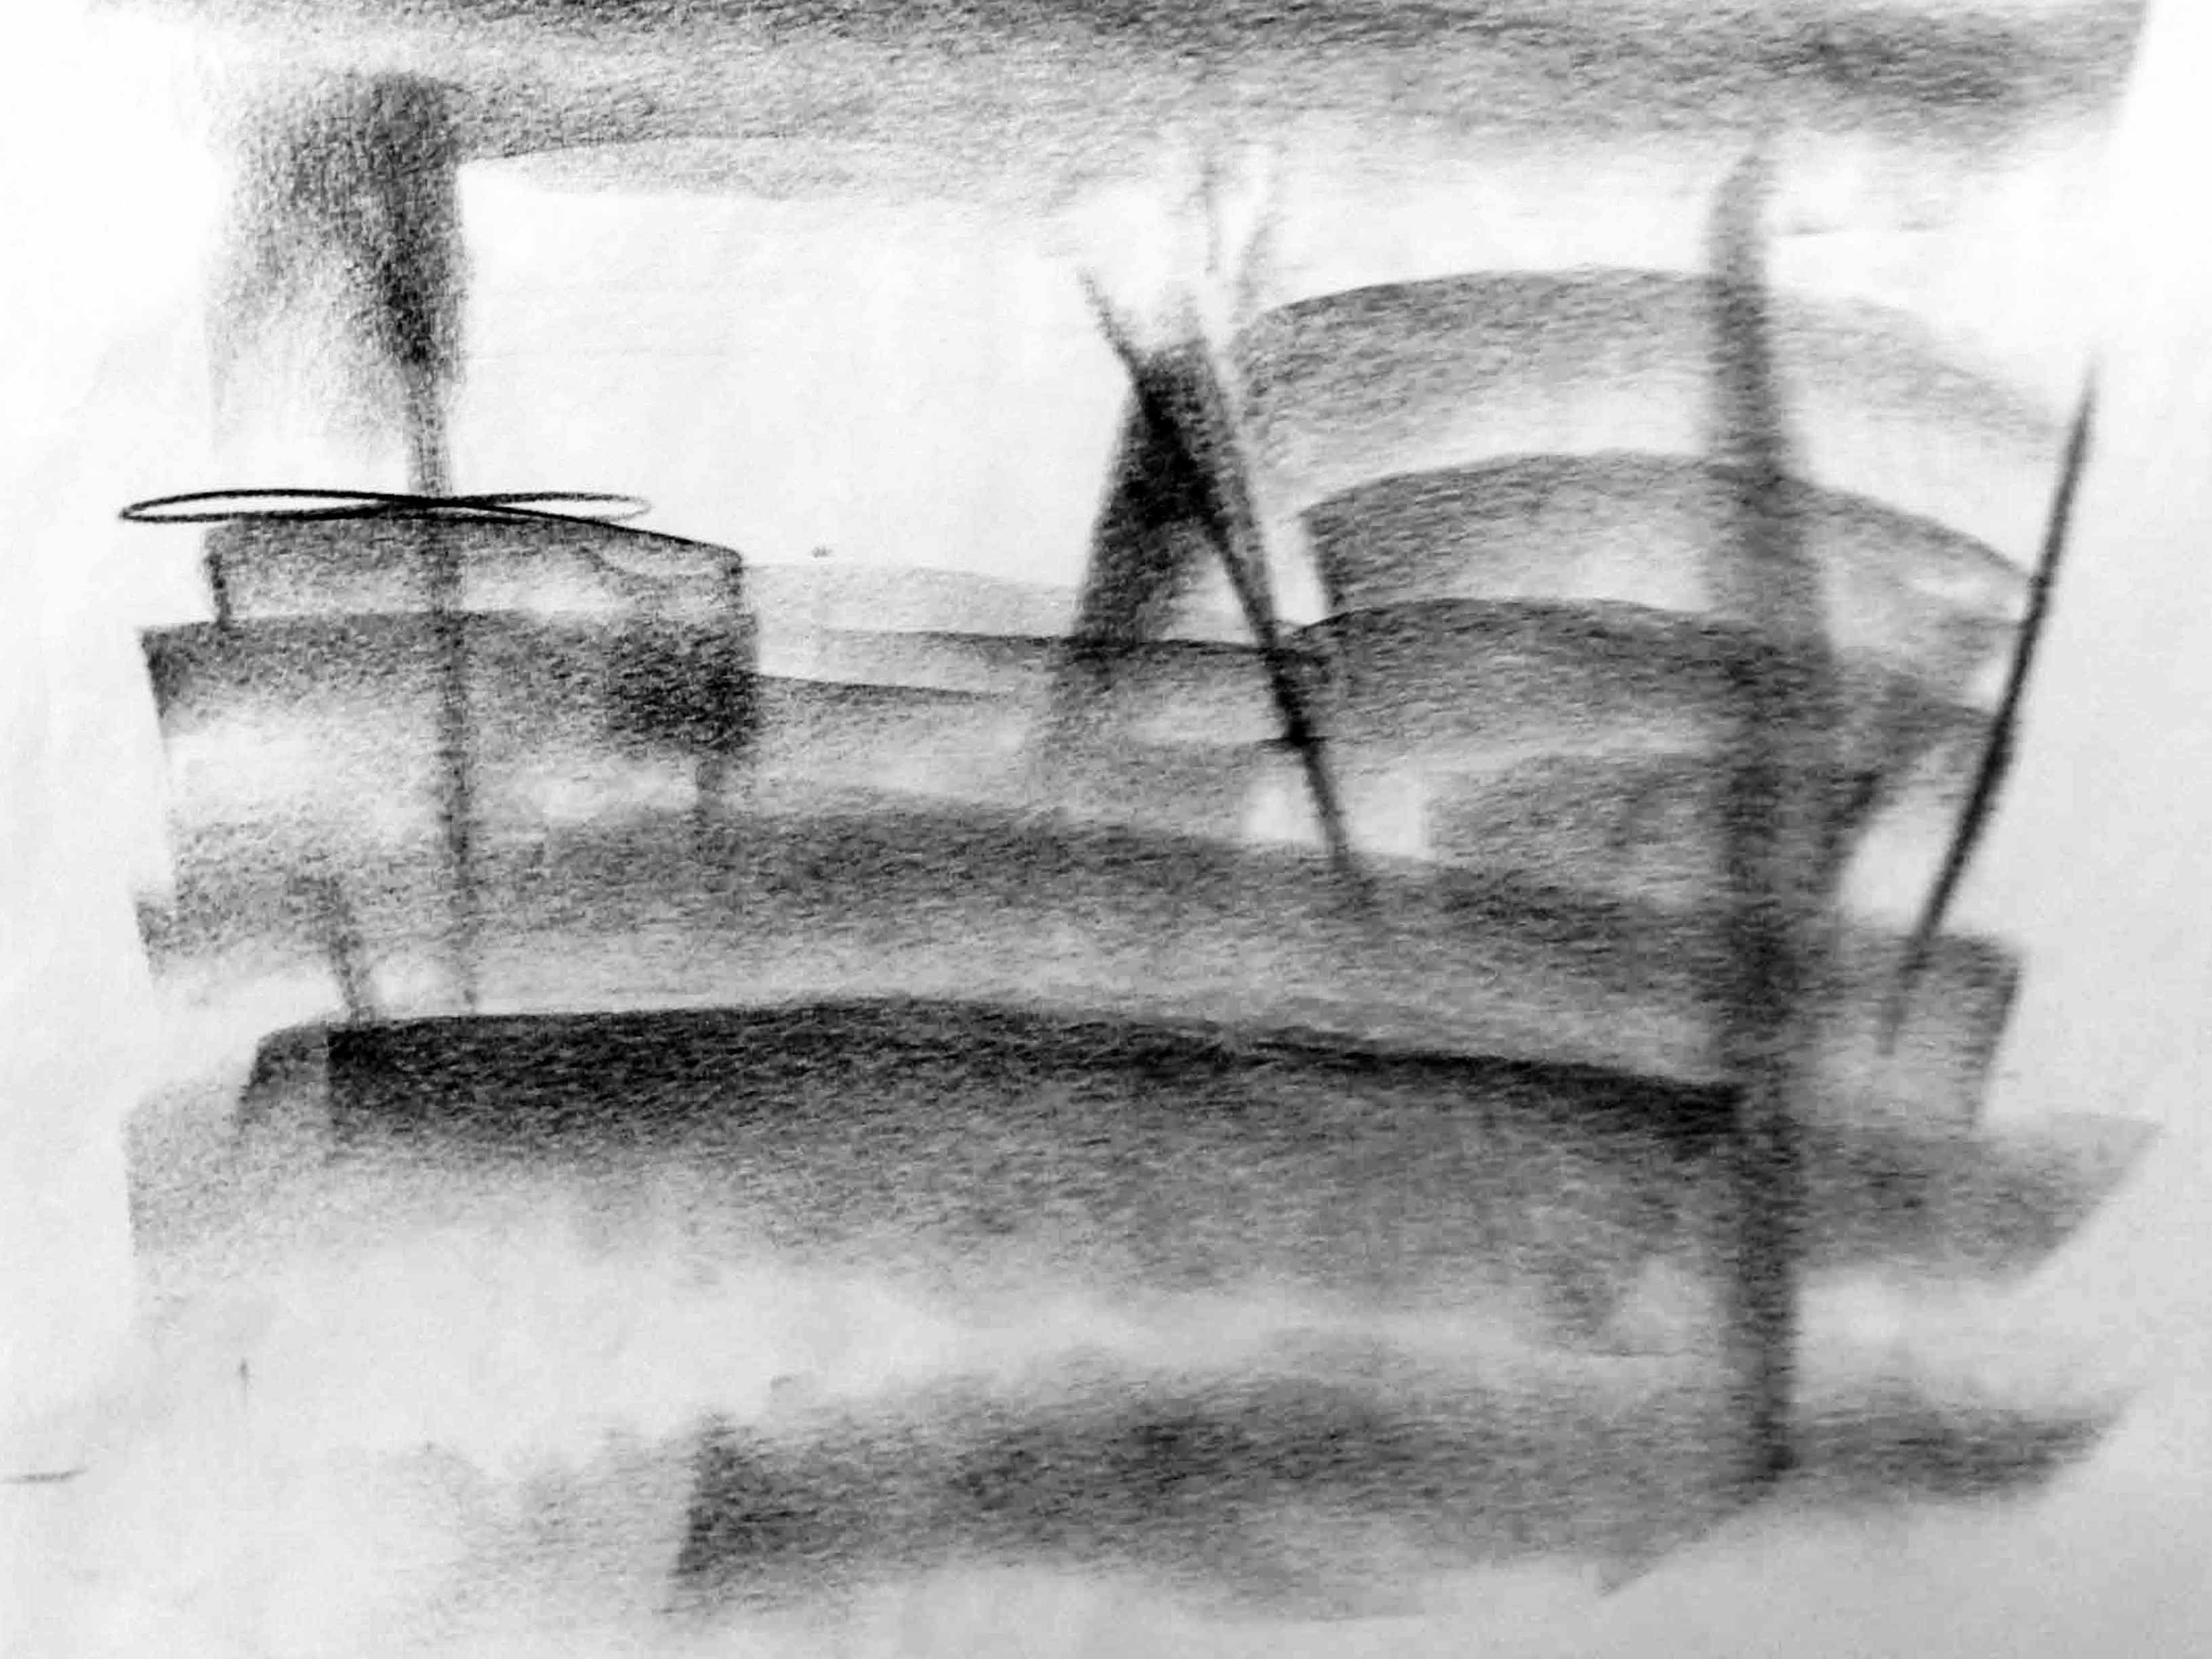
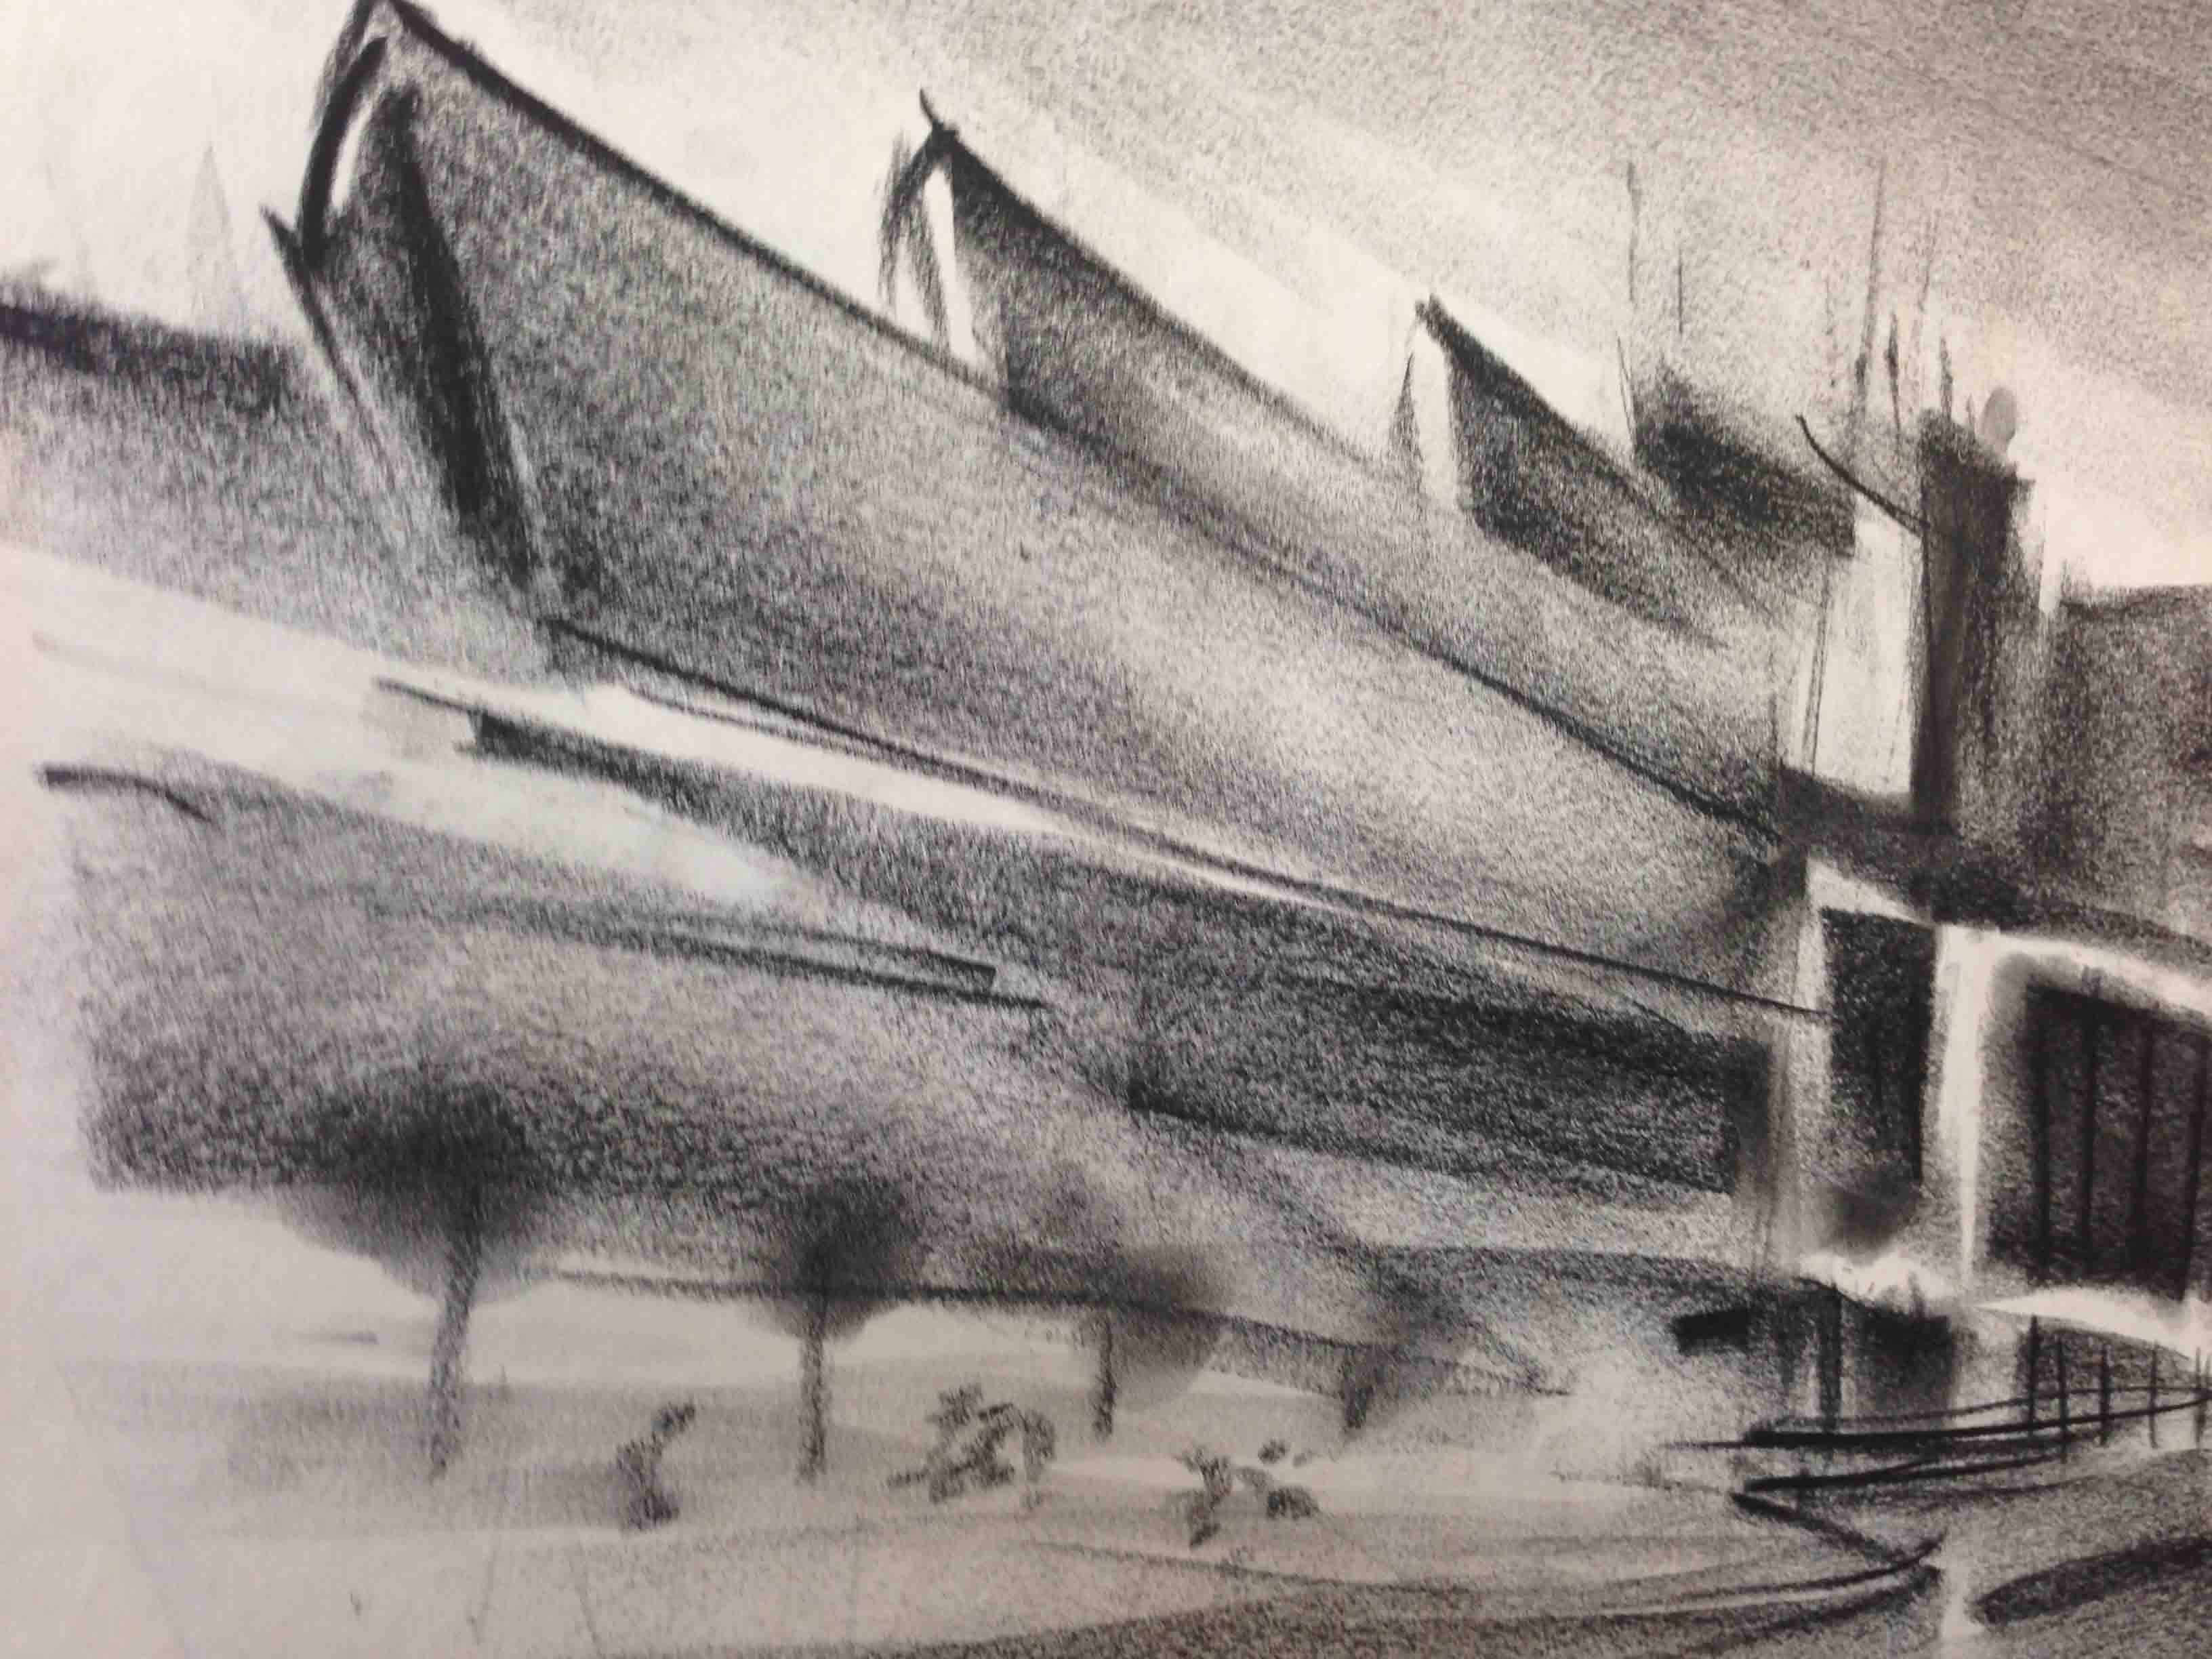
3- MASS:   The 3d volumetric ‘heft’ of a subject – like a wireframe but with more feeling of the weight of the object and its parts – 

MASS CDA 10 WAYS MAR 2015 (28)


4- SPACE:   Space must be thought of as an actual, tangible, moldable substance,  not merely the absence of form. Think of a subject immersed in water. Draw the water, encountering the subject and pausing the medium where it stops against the subject. The sum total of stoppages implies the form. But don’t draw the actual form…concentrate on the space(s) and that will gradually reveal the form. This is, perhaps, the most difficult ‘way of seeing’ to master, but there is much to gain from it. The water metaphor helps – 

SPACE CDA 10 WAYS MAR 2015 (23)


5- SILHOUETTE:   The positive silhouette is like the shadow of a subject projected on a wall. The negative silhouette is the reverse. Concentrate on ‘shape-making…don’t just draw and colour in the outlines – 

SILLHOUETTE CDA 10 WAYS MAR 2015 (18)


6-FIGURE-GROUND:   A shape or object has 3 ways to contrast with the background: darker than, lighter than or transitional (part darker and part lighter). The ‘transitional’ is also called a “figure-ground reversal”. You take control and choose – 

FIG GND CDA 10 WAYS MAR 2015 (15)


7-STEPPED TONALITY:   Translate a continuous toned image into 3 or 4 tonal values: The lights give Sparkle. The darks give impact. The mid-tones give subtlety and richness. Pay particular attention to the ‘dance of the lights’.  This creates a ‘tonal design’ versus a mere ‘documentation’ – 

TONALITY CDA 10 WAYS MAR 2015 (13)_edited-1


8- MODELING:   Select a light source and logically create shade sides and cast shadows. This is what we normally try to do when shading naturalistically – 

MODELLING CDA 10 WAYS MAR 2015 (9)


9- GEOMETRICS (Perspectives, paralines, proportion)   Apply the methods of geometry to creating the 3d visual illusion. The three main visual cues for depth are: overlapping, diminution, convergence. These are supported by ‘position on a background plane’, atmospherics, lineweights, colour temperature, degree of detail and sharpness of focus, etc – 

PERSPECTIVE CDA 10 WAYS MAR 2015 (4)


10-  COMPOSITION:  Composition is ‘what you do with all the other ways of seeing’. You have to go after composition as a special skill in itself. Don’t just rely on getting better at it by drawing a lot – that is a very slow way to progress. In music you can get very good at playing the instrument but never develop the ability to compose. In music, people go after composition for it’s own sake – so it goes with art. Apply an ordering concept, a design,  to the elements in the picture. There are many traditional systems, or you may create one of your own through observation or informed intuition. You are creating a simple, clear choreography for the eye of the viewer. This is the ‘design concept’ we apply to the organization of the pictorial image. Also consider scale, format, cropping, focal points, eyepath, dominance, balance, numbers and hierarchy of shapes, and other general design principles. Consider foreground, midground background. Dark areas have light things in them, light areas have dark things in them. Can you have a transition in figure-ground somewhere? I deal with composition in more depth elsewhere among my blog entries – 

COMPOSITION CDA 10 WAYS MAR 2015 (2)

SKETCH-MODEL EXAMPLE

IMG_3708 IMG_3728 IMG_3723 IMG_3712

Learn to do this in my Emily Carr course on “Building Architectural Models and Maquetttes”. This is a typical model built by one of my students. It took about 20-24 hours of work with hot gluegun and foamcore. It is a ‘design sketch model’ in that the purpose is to be able to build-change-rebuild during the design process. Generally, buildings designed with 3d modelbuilding supplementing the process are richer in terms of form. It can look quite finished if photographed carefully, but the main purpose is for design.

ACCEPTED TO UBC ARCHITECTURE SCHOOL! (Click title – link to portfolio below)

Congrats on your acceptance! (I just got this note from a recent student today. Jordan took several of my architecture related model-building, design, and drawing courses, all represented in his portfolio) :  

 Hey Tony!  I found out today that I was accepted into the UBC architecture program for this coming Fall. I could not have done it without your help and guidance, and I look forward to joining you in some more classes this summer.  I’ll attach my portfolio to this email in case you want to use it as an example on your website.  All the best,     Jordan

Grubner_Jordan_MArch1_2014Portfolio

SSWR night 3, May 7 – PERSPECTIVE PRINCIPLES 1 2 3 POINT, FISHEYE (1 of 4) (mar 8 2015)

Login to view this content or Join us and Register.

Please note: Some video tutorials are exclusive to students currently enrolled in courses at Emily Carr. If you are already logged in but you cannot access this content, if may be because you do not have the required membership level. Please contact Tony if you are interested in a course.

SSWR night 3, May 7 – PERSPECTIVE PRINCIPLES 1 2 3 POINT, FISHEYE (2 of 4) (mar 8 2015) Click vid title

Login to view this content or Join us and Register.

Please note: Some video tutorials are exclusive to students currently enrolled in courses at Emily Carr. If you are already logged in but you cannot access this content, if may be because you do not have the required membership level. Please contact Tony if you are interested in a course.

SSWR night 3, May 7 , May 7- PERSPECTIVE PRINCIPLES 1 2 3 POINT, FISHEYE (3 of 4) (mar 8 2015) Click vid title

Login to view this content or Join us and Register.

Please note: Some video tutorials are exclusive to students currently enrolled in courses at Emily Carr. If you are already logged in but you cannot access this content, if may be because you do not have the required membership level. Please contact Tony if you are interested in a course.

error: Content is protected !!